For the UK all fabric buttons must conform to all aspects of BS 4162. In order to ensure buttons are securely attached to garments a minimum pull force of 90 Newtons (9.17 kg) is required. 1 Newton = 0.101971621298 kg. Independent laboratory and factory in house button pull test is required. Please note that any independent laboratory testing will be actioned by David Howard UK. The factory is responsible for carrying out their own in house button pull test, as per this guideline. All fabric buttons must comply with REACH EC 1907/2006 Annex 17 No. 27. For the UK buttons must not resemble food and must comply with the Food Imitations (Safety) Regulations 1989 SI No. 1291.
Buttons must be tested for colour fastness to water and garment durability.
Wood/cork/leather/mother of pearl (shell)/glass or other non-durable buttons must not be used on children’s clothing.
Buttons must not have rough or sharp edges.
Buttons must be free from rust and contamination.
Covered buttons used on garments for children less than 36 months must be secured with a stitch through the button onto the garment.
Knitted covered buttons – plastic buttons to be lockstitched on and crochet around the button to give the effect. Must pass a 90N button pull test
Button Pull Test Machine Sop
We do the pull test of the button normal or snap according to the buyer requirement.If the requirement is not present we maintain our procedure.
At first we make the mock up and attach the button onit if it is passing then we attach the button on the garments
We maintain snap button pull test required is 90/n that means 9.17 kg and height presser is 100/n that means 10.19 kg =9.8
We spent 10 to 15 second for button pull test.
If normal button is 4 eye then the pull test presser need 90/n if it is two button then pull test presser need 50n(that means 5.10kg)
Now we are doing hourly button pull test and we keep the record pass or fail and concern people put the signature on it
Childrenswear Only
Buttons on children’s garments must not contain toxic elements in excess of the limits specified in EN 71:3.
Jewelled or 2 part fabric buttons are not permitted on childrenswear.
Toggle buttons must be assessed for shape, catchment and attachment hazards.
Buttons can only be fabric covered if 1 piece.
Fabric Buttons Attach
All fabric buttons must be attached using a lockstitch button attach machine. Minimum of 10 stitches. For George orders a slight tonal thread must be used in the bobbin for easy identification of lockstitch buttons. Please ensure that you use the colour thread you intend to use in bulk on the pre-production samples to obtain approval of the tonal thread used prior to commencing with bulk.
Fabric Buttons Attach
Buttons must not be handstitched or chainstitched.
When attaching a button the following factors should be considered in order to guarantee a secure attachment: Also refer to BS 7907:2007.
Thread quality and ticket size
Number of stitches
Button quality
Distance between holes on button (pull stress distribution)
Fabric type
All buttons must be attached using a lockstitch fabric buttons attach machine:
2-hole buttons must have 14-16 stitches
4-hole buttons must have 24-26 stitches
4-hole buttons must be stitched through each hole.
Only core spun polyester sewing thread to be used when attaching buttons.
Buttons must be attached through a secure foundation of fabric, typically at least 2 plies of fabric with a suitable interlining if required in order to achieve secure attachment.
Please ensure the needle in the lockstitch button attach machine is changed daily when the machine is in constant use – in order to prevent damage to the fabric.
For garments that require a wash, it is recommended that buttons are attached after washing to avoid damage to either the button or the garment.
Spare buttons must only be used on adult wear and must be securely lockstitch attached to the garment.
No fabric buttons markings must be visible on production garments.
Buttonhole
Lockstitch buttonhole are required. Exceptions to this must be discussed with David Howard UK.
Buttonhole openings must be made through a secure foundation of fabric, typically no less than 2 plies of fabric with a suitable interlining where necessary.
Buttonhole openings must be 2mm larger than the button for ease and security of fastening.
No buttonhole marking must be visible on production garments.
Knife blades should be changed regularly to ensure they are sharp and correctly set at all times.
Inspections & In-House Testing
Inline Inspections must be performed for due diligence purposes for all childrenswear (under 16).
Factory in house testing must be carried out to confirm this.
In-house tests must be carried out for each order/style (Mens- and Childrenswear).
All factories must have a pull test machine.
The SOP of the button pull testing must be displayed near the machine.
The machines must be calibrated every year, with certifications available. A sticker with date of calibration and expiry date must be displayed on the machine. Calibration certificate should be displayed near the machine.
The button pull test results must be recorded on a process control chart, clearly stating the machine number and ident.
Every line/machine needs to be checked every 2 hours. The check can be carried out with a mock up (same style/same construction fabric) rather than an actual bulk garment to avoid shortages to the order. The mock up must be made under bulk conditions using bulk machines of the relevant line.
The first check must be at the beginning of the shift.
All records must be kept for 5 years.
A minimum of 5 samples must be checked on each machine.
Buttons checked must cover all different locations of attachment, e.g. placket, collar, cuff, spare buttons, epaulettes etc., as different locations can have different results and different reasons in case of a fail.
All tested samples must be destroyed or marked and kept in such a way that they cannot get mixed into bulk production by accident.
If the needle or sewing thread breaks a pull test is required.
If the bobbin runs out during the operation, stop production and check the stock.
All records must be available for David Howard or any auditor to audit.
If the results are below 90N do not carry on with production, but stop and check stock. For this you must be able to identify the stock that was done in the last 2 hours since the last successful check.
3rd Party Button Pull Test
An independent test report is required on all button pulls. This will be arranged for by David Howard UK.
The button pull test report is valid for one season only ( 6 months)
(If the factory, sewing thread, button or fabric changes a new test report is required at the independent lab.)
5 garments must be send to the lab to be tested (as per BS7907:2007). Only complete garments should be sent and not mock ups, so the lab can clearly state which button has been tested on which part of the garment.
The following table shows examples of which buttons need a test report:
Button size
Button colour
Fabric colour
Fabric thickness
Thread colour
Thread quality
No. of button pulls required
same
same
same
same
same
same
1
same
different
same
same
same
same
1
same
different
different
same
same
same
1 per fabric colour
different
different
same
same
same
same
1 per type of button
same
same
same
different
same
same
1 per fabric thickness
different
same
same
same
same
same
1 per button size
Rouleau loops must be machine stitched only. Elasticated Rouleau Loops must pass a 90N pull test performed by a nominated lab. All records must be kept for a minimum of 5 years.
Self fabric loops do not require button pull test.
An On / OFF switch is mounted on the Led Work Light for Sewing Machine assembly and is supplied with a 1Meter mains input cord plus a clamp for fixing the lamp assembly on the sewing machine and will give 500-700 Lux at the needle point. The Led work light, Model: KWL-5W, is fitted with a energy saving CFL lamp and illuminates the work area very effectively without creating shadows and also avoids any glare & reflection on the worker, thereby reducing worker eye fatigue and hence improving efficiency and work output.
Led Work Light Specifications
Input: 170 – 250Vac / 50Hz
CFL Rating:5 Watts, “Cool” Light
Colour:White,
Flexi Arm Length:13” / 330mm
Expected Life of CFL:3 Years
Energy Saving Led Worklight:
Use of this led worklight gives shadow free illumination of the work area, glare free & Advantages operation hence less operator fatigue resulting in higher work outputs plus tremendous energy and cost saving as the following example illustrates this concept:. These are cool lights and avoid increasing the ambient temperatures, rather these help to reduce ambient temperatures associated while using general hall lighting fixtures.
Energy Saving Led Worklight
Assuming a manufacturing facility with 100 sewing machines and currently using 40 Watt * 200 Tube Lights in the hall to provide the required illumination at each work station.
If these are now replaced by 100 * 5W KOMATSOO led work lights, the nett saving is of 7500Watts, i.e 7.5 KWHours, which translates into a cost saving / annum of Rs.72,000, which is based on a 8 hour work day + 300 working days in a year & at a tariff of Rs.4/KWHour, The cost of these led worklight are hence recovered within 6 months itself.
Additional savings are also there as only need based led work lights are switched ON compared to all the hall led worklight being kept ON irrespective of the number of stations in operation.
The Bills Pay Machine is an offline device where transactions are updated manually. To ensure no more standing in the long queue BILL MACHINE for garments customers launched bills pay centre to facilitate both its customers and non customers. To get the benefit of bills pay machine it is not necessary to be a BILL MACHINE for garments account holder as bills pays machine is open for both customer and non customers to pay their utility bills.
Motto of Bills Pay Centre:
“Say good bye to long queues”
Benefits to Customers:
Free day and night service for both customers and non-customers
No registration required to use the service.
Allowing customers the privilege of depositing cash / or cheque through bearers
Credit card and other Utility bill payment option available
Fund transfer option (ATM card)
Customers have the option to pay from their accounts in addition to paying cash / cheque.
Servicing of Bills Pay Centres
ATM team is responsible for servicing Bills Pay Machines. Each machine is serviced twice daily (by 12:00 P.M. & by 5:00 P.M.) on all working days.
Deposit made on a holiday is updated in eBBS in the next working day.
All payments collected by 12:00 P.M. each day are updated in the system in the same working day.
All payments collected after 12:00 P.M. each day are updated in the system in the following working day.
Services Offer by Bills Pay Centre:
Services Available
Addition Features
Credit Card payment
Customers can pay in cash / cheque
Account Deposit
Customers can pay from their account
Fund Transfer
through a debit instruction
DESA, DESCO, BTTB bill payment
Customers can send bearers to make the payment
Table: 3.3 Service offered by Bills pay Centres
Processes Involved:
The Bills Pay Machine is an offline device. All transactions are updated manually.
The ATM Team collects all the envelopes and the data files from each machine.
Cash is sorted and tallied with the amount shown on the data file
Count of envelops is tallied with the no. of transactions in the data file
Transaction are updated in eBBS by manual entry
In case of clearing cheques, the cheques are sent to item processing for clearing.
In case of DESA, DESCO, BTTB payments, a consolidated sheet is forwarded to CMO for credit to their respective accounts and reporting.
In cases where the transaction could not be updated due to cash mismatch, cheque return, insufficient fund in customer’s account or signature mismatch, the customer is informed.
Bank Payments:
The customer can make credit card payments or even deposits into his/her account round the clock. All the customer has to do is:
Select the preferred option and key in the amount they with to pay/ deposit.
Select the mode of payment – the customer has he option of paying / depositing cash, cheque or debit instruction (if an BILL MACHINE account holder)
He / she must put the cash / debit instruction inside the envelope and seal it.
Write the transaction number on the envelope and drop it in the machine.
Utility Payments by Bill Machine
Payment of DESA, DESCO and BTTB bills can be made through BillsPay.
The customer has to follow the following steps:
Select the preferred option
Key in the amount he / she wishes to pay
Then the mode of payment select — the customer has the option of paying / depositing cash, cheque or debit instruction (if any BILL MACHINE for garments account holder).
Put the cash/cheque/ debit instruction inside the envelope and seal it.
Write the transaction number on the envelope and drop it in the bill machine.
Wilcom embroidery studio e1.5 have two major options available during installation. One is Wilcom Embroidery Studio and another one is Wilcom DesignWorkflow. There are also sub-components of Wilcom Embroidery Studio e1.5 Modules which you can install or remove separately as required. The wilcom embroidery studio e1.5 installation does not uninstall previous versions of the software. If you wish to preserve user-defined settings, motifs as well as program splits, and custom alphabets, you need to install Embroidery Studio before removing any previous version. This will allow the installation to copy the necessary files to the new location. If you wants you can then uninstall the previous version via the Windows Control Panel after successfully installing the current Embroidery Studio. Wilcom 2006 Install procedure is complitly different with Studio e1.5
Requirements after download wilcom embroidery studio e1.5
CPU : Minimum 1 GHz Intel or AMD 32-bit (x86) processor, Recommended 2 GHz + Intel or AMD 32-bit (x86) processor
Operating system : Minimum Windows XP SP2, Recommended Windows Vista Business SP1, Embroidery Studio does not support Win98 or Windows NT/2000.
Browser: Minimum I.E. 6.0 or Later, Recommended I.E. 7.0 or Later
Internet connection Required for product registration and access to software updates.Embroidery Studio requires IE 6.0 or higher.
Hard disk: Minimum size 40 GB, Recommended 80 GB or more. Embroidery Studio occupies up to 1Gb of hard disk space, depending on the options installed.
Free disk space : Minimum At least 5 GB after installation (nondouble-spaced), Recommended 15 GB after installation
Graphics card: Minimum Support for Highest Color (32bit) and resolution (1024 X 768), Recommended Support for DirectX 9 graphics with: WDDM driver- 256 MB of graphics memory – Pixel Shader 2.0 in hardware- 32 bits per pixel – Dual monitor capable
Monitor: Minimum 17″ at 1024 X 768 , Recommended Dual monitors capable of displaying 1280 X1020. You need to calibrate your monitor so that designs at 1:1 scale appear at real size. Do this when you first install Embroidery Studio or whenever you change your monitor
Scanner, printer and plotter: Windows-compatible (any connection method – e.g. parallel, USB) USB ports Dedicated USB port for a USB dongle (V1.0 or V2.0)
Mouse : PS/2 or USB mouse
Data drives DVD-ROM drive: for software installation Backup device – e.g CD/DVD burner
Sound card: Required for multimedia training
Wilcom embroidery studio e1.5 Modules
Embroidery Studio ,
ES Machine Manager,
ES Cross Stitch,
ES Chenille,
ES Schiffli.
DesignWorkflow software.
CorelDRAW
Security device
All purchases of Embroidery software from CADWilcom whether new, updates, or upgrades, are shipped with a USB type of dongle. These software will not work properly when the dongle is unplugged from a computer during Embroidery is open. The application may be hang or may be crash and any open files may be corrupted during the time. The dongle is the important and best valuable part of your system and it should be treated with care. Always store this in a safe place when not in use. Wilcom Company ensure the dongle against defects in material and workmanship under normal service when properly installed, for a period of 12 months from the date of delivery. If it is faulty, it may be exchanged. If it is physically damaged, it can be sent to Wilcom and a replacement purchased for the cost of the dongle alone. However,if you loss or theft, you will need to purchase an entire Embroidery Studio replacement system. For this reason, you should consider insuring your dongle. Every dongle has its own serial number and identification code so your system can be uniquely recognized. The security codes enable access to features within the software. When upgrading or upgrading your software, you re-program your dongle by entering access codes via the software. See Changing security device options for details. If you are updating from an earlier version of the software, or are upgrading product models, you will be supplied with a generic dongle. This needs to be programmed with the serial number and identity code of your existing dongle so your system can be recognized. Wilcom embroidery studio e1.5 crack free download is strictly prohibited from wilcom official site.
Install Descargar wilcom embroidery studio e1.5
AT first close all windows programs but quite windows running
Please do not attach your dongle until prompted to do so. If for any reason you do attach the dongle key before descargar wilcom embroidery studio e1.5 is installed or the pc rebooted, you should cancel the windows auto detect Hardware wizard if it appears.
Insert the descargar wilcom embroidery studio e1.5 installation disk. The installation program should start within 20 seconds and the welcome dialog appear.
After that accept the terms of the license agreement and after that click next. During this time you are prompted to attach your dongle key. Product models, you will be supplied with a generic dongle supply by wilcom pty. These needs to be programmed with the serial number and identity code of your exsiting dongle so your system can be uniquely recognized.
After that attach the dongle and click next. The user information dialog opens prompting you to enter your user details as well as access rights.
Enter your details information and select whether you want to install the system for personal use only or for anybody who logs onto the computer. If you choose personal use only, the system will show the desktop icon, program group and program listing only with your logon.
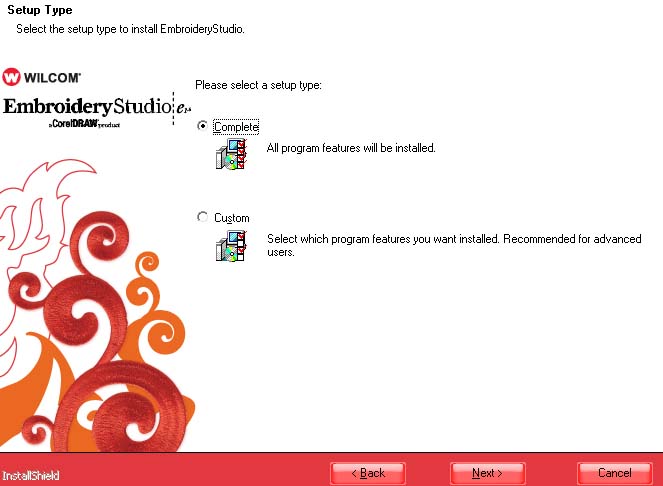
After that enter your information details and click next. The choosed products dialog opens prompting during install Embroidery Studio and/or design workflow. The typical installation defaults to Embroidery Studio
To accept the typical installation of descargar wilcom embroidery studio e1.5 and then click next.
After that choose an installation type for descargar wilcom embroidery studio e1.5
After that click next to proceed for the descargar wilcom embroidery studio
After that click the browse button if you want to change the installation location. The installation displays a standard file browser, allowing you to choose and if necessary create a destination folder for your installation.
If you are installing a multi-language version of the software, choose the install extra languages checkbox as required and click next.
After that choose any extra languages required and click next.
After that change the design folder location if required and click next.
After that click next to proceed.
After that choose a previous version or choose not to merge and click next.
After that click install to proceed.
After the installation has run, an installation complete dialog of appears.
Finally click finish to restart your computer.
Engr. Kh. Mashiur Rahman, Garments Auto Machine Technologist, Web: www.autogarment.com
A hi-speed lockstitch sewing machine is the best common mechanical system stitch made by the sewing machine. The term of single needle stitching often found on dress shirt labels, referering to lockstitch machine. The height of needle from its lowest position of upward stroke when the hook point reach at the center line of needle.
Feature of Lockstitch Machine
Most common machine for woven garments
More secured sewing
No of needle:1 or 2
SPM:1500-5500
Stitch Density is variable, max. stitch length 5mm
Different types of feed mechanism (Puller Feed, Top AND bottom Feed etc.)
Automatic bobbin winder and thread trimmer present in some of the versions.
Needle Replacement: Check whether the needle of hi-speed lockstitch sewing machine is bent or blunt or not. If it is bent or blunt change the needle and install it under the supervision of maintenance personnel.
Rotary hook: Clean the tail of thread of hi-speed lockstitch sewing machine dust and lint in the rotary hook and bobbin case.
Lubrication:Lubricate the lockstitch sewing machine parts where necessary.
Time required: 10 minutes.
Cleaning the bobbin case and other possible parts: Clean the lint, loose thread and other dirt from the shuttle of bobbin and bobbin case. Besides the table and other parts which cannot effect the setting must be cleaned.
Required time: 5 minutes.
Lockstitch Machine Weekly Maintenance:
Done by : Maintenance Personnel
Supervised by: Maintenance Manager
Criteria:
Needle – Hook point timing: Check whether the needle of lockstitch – hook point timing is correct or not. If there lies miss-timing then adjust it.
The check points are
Needle – hook point clearance
At the same time the distance between the hook point and the top end of the needle eye.
Required time: 10 minute.
The clearance between bobbin case holder and bobbin case holder bracket: Check the clearance between the bobbin case and bobbin case holder bracket (1-1.5mm). Make sure that the hook will not touch bobbin case holder bracket of lockstitch mc.
Required time:5 minutes.
Presser foot pressure: Check whether the pressure of presser foot of lockstitch is proper or not. If not adjust it by adjusting the distance between the bottom washer and top of pressure bar guide bracket. And the bottom of work clamp must be kept parallel to the top of the work.
Required time: 5 minutes
Thread take-up amount: Check the amount of the thread take-up stroke, clearance between needle thread and thread take-up lever guide (.5-1 mm). Make sure that it is not more than necessary.
Required time: 5 minutes
Needle & bobbin thread tension adjustment: Check whether the standard operating range of thread take-up spring of lockstitch mc is accurate or not (6-8 mm). The tension at appropriate operating range must be checked.
Required time: 5minute.
Needle installation: It must be remembered during needle installation of lockstitch mc that the long groove of the needle is on the left and tightened with the needle clamping screw. Adjust the needle clearance and lift amount.
Required time: 2 or 3 minute.
Stitch Length: Check whether the lockstitch length is appropriate or not. If not , push the reverse feed lever halfway down, turn the dial until desired number align the pin at top and release the reverse feed lever. It is remembered that the number, the longer the stitch length will be and the reverse sewing device is the automatic-resetting type.
Required time: 2 or 3 minute.
Needle Bar height: It is remembered that when the needle bar is in its lowest position the reference line on the must be at the lower end of the containing the needle bar. If it is not so, remove the needle plate, loosen the needle bar connecting stud clamping screw and adjust by raising or lowering the needle bar.
Required time: 10 minute.
Adjstment of Pressure on the material (fabric): The pressure on the material during sewing must be as weak as possible, but strong enough so that the material does not slip. Adjust the pressure through loosing the adjustment nut.
Required time: 5 minute.
Feed Dog Height: The standard height of the feed dog for sewing thin material is 0.8 mm, and for medium material is 1.00 mm and for thick material is 1.2 mm (when the stitch length is set to the maximum).
Adjust the feed dog height by loosening the screw when the feed dog is above the needle plate surface and move the feed lifting arm up and down.
Required time: 5 minute.
Feed dog angle: in order to prevent puckering, material from slipping the feed dog is to be raised or lowered downward at standard angle.
When the feed dog angle has been adjusted, check to confirm that the height of feed dog has not changed.
Required time: 5 minute.
Presser foot height: The standard height of the presser foot is 6 mm when the presser foot is raised with presser foot lifter lever. To adjust the presser foot height, loosen the nut of the adjustment screw and then the presser foot adjustment screw so that no pressure will be applied to the presser foot, then loosen the set screw and adjust the presser foot height by raising or lowering the presser bar.
Required time: 5 minute.
Lockstitch Machine Monthly Maintenance
Oil replacement and other interrelated checks:
Check lubricant or oil whether that is to replace.
Check bush leakage, oil seal leakage or age, vibration of oil and the flow of oil pump more or less than setting.
Check rubber cushion seats, four corners of machine tool groove on which oil pan stands.
Required time: 10 minute.
Rotary hook of plain sewing machine: Check rotary hook wear whether it is need to replace.
Required time: 10 minute.
Presser foot canal: check hi-speed lockstitch sewing machine canal wear. If necessary replace it.


